Saturday, November 16, 2013

Jester Maquette Progress

Over the past couple of months, I have been periodically adding clay to my jester armature in order to create a maquette for molding. Its a pretty simple process at this point, just heating oil based clay to make it softer and adding the clay onto the armature. Then when the clay is blocked up on the armature, its it then sculpted and refined into a satisfactory body shape.


Front View
Side View

 I am going to make actual clothing for the jester character to wear so I made it a point not to put much detail in the body. I did put in a little more detail with the feet, giving him medieval looking footwear.
Close Up on Feet

If you have noticed a break in the neck, is was left that way intentionally. I have been working on the head and will size up the neck and head together.
Neck and Wrists Remain Open

And for the hands, I am not sure I want to mold them separate or attach them to the body. I am waiting for the final decision on the hands once I finish the head and replacement faces -which just happens to be the topic of my next post!

Wednesday, October 9, 2013

Armature Hands

Its been a little while since I updated my progress, so here goes! I have made hands for my Jester armature. In the past, I have just used epoxy to attach wire hands the metal rod arms. I had little success with that as the epoxy or aluminum wire would break after animating for a while. So I decided incorporate an hybrid approach.

Jester armature hand
I created a metal joint to attach to the ball at the end of the armature's arm. Armature wire is then looped through a hole in that joint and wire fingers are made around the initial loop. I then epoxied the fingers at the base to hold them in place. I can already tell that the hands feel way more solid then just wire alone.
Hand to armature comparison

The hands do not seem too out of proportion with the rest of the figure, but fine tuning will be done as I start sculpting the maquette.

Monday, September 16, 2013

Jester Armature

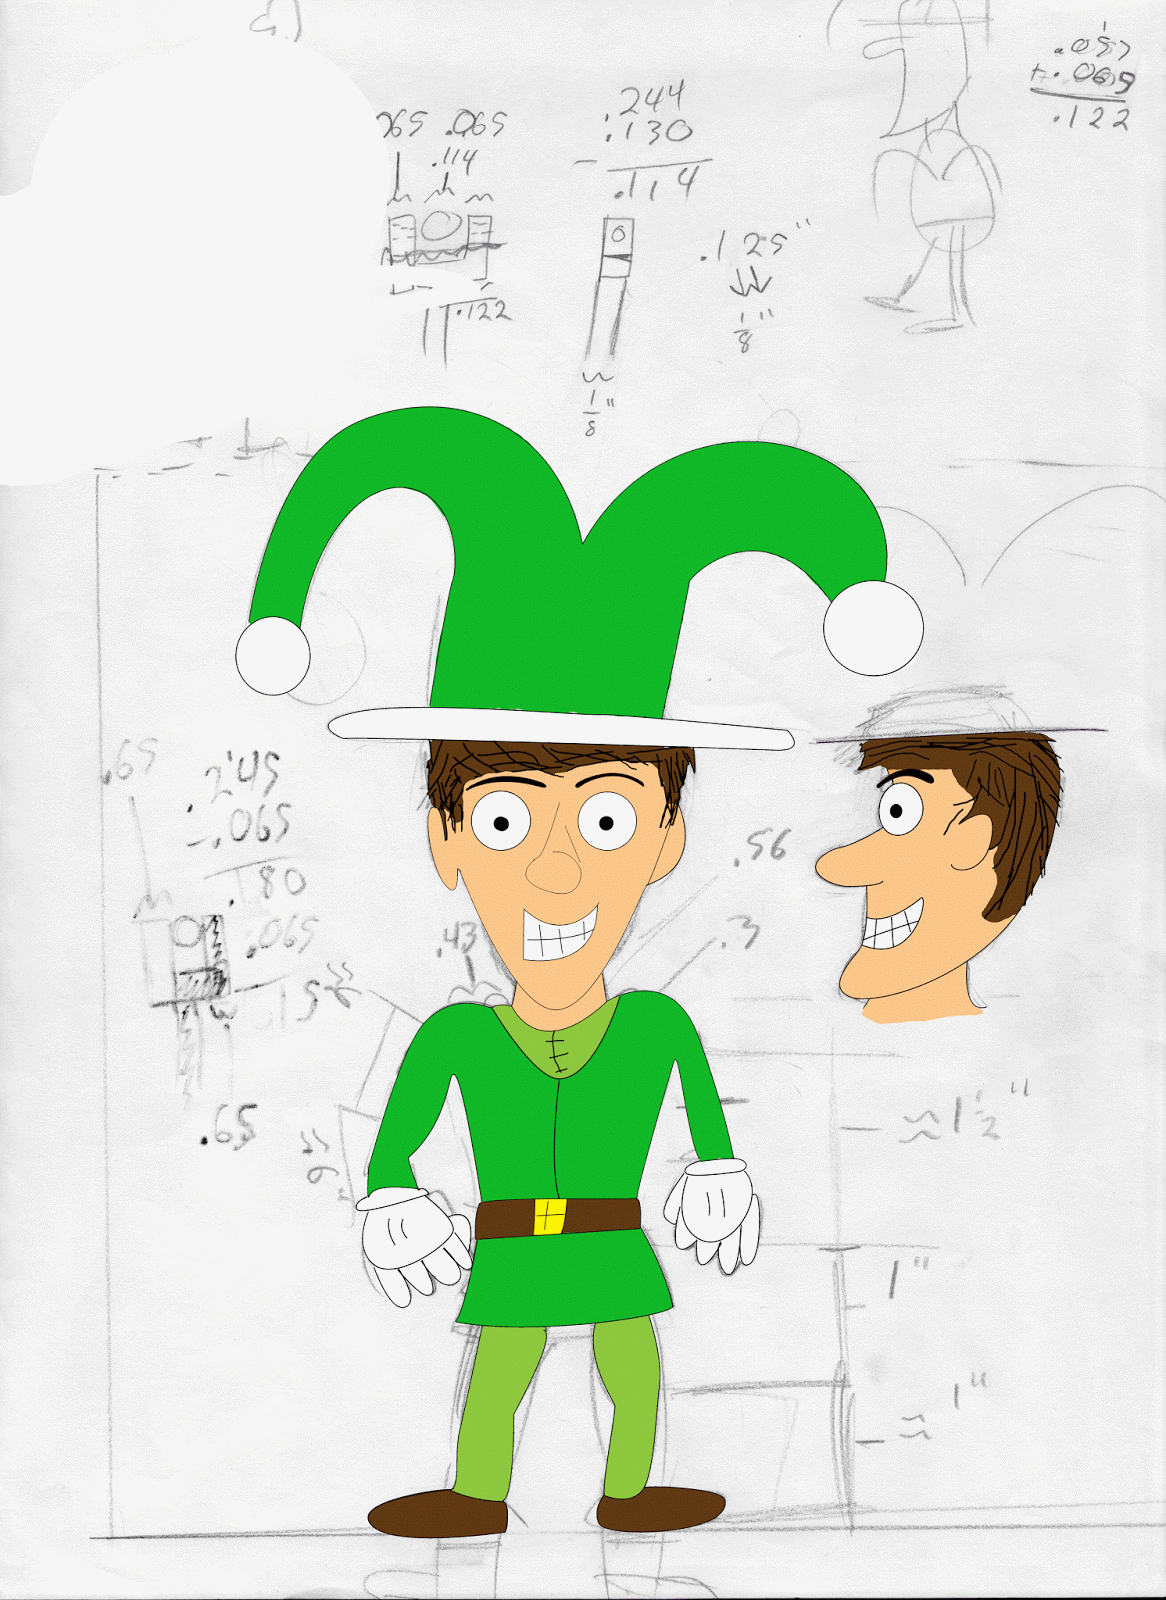
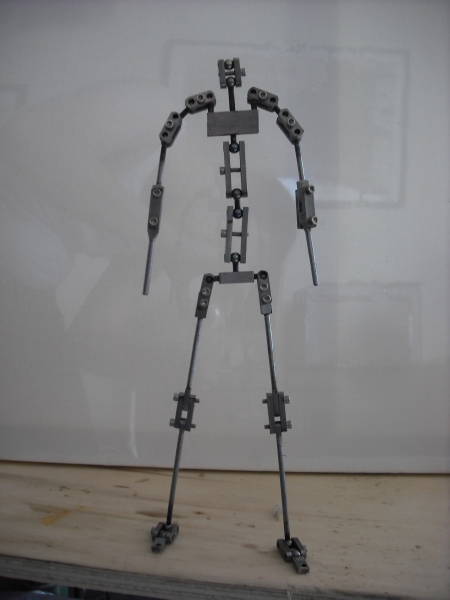
Since I have posted last time on this project, I have been working the armature for the jester character. In the course of the film, this character will be picked up by larger characters and rustled around. So instead of the 12 inch characters I am used to making, I actually designed the jester to be more around somewhere between 5 to 6 inches in height. And to make him look a bit more cartoonish, (you can actually see this in the last post I made) I designed his head to be larger in proportion in to the body. This really made the new design quite tricky. However, I am very happy with how the armature looks and moves.


the armature with tape measure reference

front view large


Side view large


I had made ball and socket armatures for 5 or 6 years now. Not only is this armature the smallest one I have ever built, it also uses swivel joints which I had never incorporated in an armature before. Despite needing machining to super tight tolerances, they work fantastic. The other joints I have used before, but are less bulky with fewer individual parts. I can't wait to make it into an actual stop mo puppet!

Thursday, August 29, 2013

The Jester's Task...a Prelude

My newest animation, "The Jester's Task" is a short film has been in the works for quite sometime. It first came about when I was thinking about how my last short (ie my senior project) turned out quite poorly. It really struck a blow to the ego, because my film before that, "Billy and the Skeleton" turned out so well and still makes me proud to this day. To make a long story short, I found that I tried to do too much in too little time. And now that unfinished film has been scrapped, as all the work I had done was lost my old laptop was stolen in cruel twist of fate.

But not all is lost. I have been working on "The Jester's Task" for many months now and I have some material I can share with the world. I will be posting my progress gradually. There is still quite a lot to work on. If you are like me, you are just itching to see whats going on behind the scenes. I will leave you with a some concept drawings. My next post will put them in more context. Enjoy!
The Jester-with color


Knight Concept- Photo of original drawing


Ball and Socket Armature